Remote IoT monitoring using SSH on a Raspberry Pi is becoming increasingly popular among tech enthusiasts and professionals alike. This technology allows users to monitor and manage IoT devices from anywhere in the world, ensuring efficiency, security, and real-time control. Whether you're a hobbyist or a professional, understanding how to leverage SSH for remote IoT monitoring can significantly enhance your projects. In this article, we will explore the ins and outs of this topic, providing you with actionable insights and expert advice.
IoT (Internet of Things) devices are transforming the way we interact with technology, enabling automation, data collection, and remote control. However, managing these devices efficiently requires a reliable and secure method of communication. SSH (Secure Shell) provides a robust solution for remote access, allowing users to interact with their Raspberry Pi and connected IoT devices securely. This article will guide you through setting up and optimizing remote IoT monitoring using SSH on a Raspberry Pi, ensuring you have the tools and knowledge to succeed.
By the end of this article, you will have a clear understanding of how to implement remote IoT monitoring using SSH, the benefits it offers, and best practices to ensure security and performance. Whether you're managing smart home devices, industrial sensors, or any other IoT application, this guide will equip you with the expertise needed to take full control of your IoT ecosystem.
Read also:Securely Access Iot Devices Anywhere Using Ssh On Android
Table of Contents
- Introduction to Remote IoT Monitoring
- Understanding SSH on Raspberry Pi
- Setting Up SSH for Remote Access
- Configuring Your Raspberry Pi for IoT Monitoring
- Securing Your SSH Connection
- Tools and Software for Remote IoT Monitoring
- Best Practices for Remote IoT Monitoring
- Troubleshooting Common Issues
- Real-World Applications of Remote IoT Monitoring
- Conclusion and Next Steps
Introduction to Remote IoT Monitoring
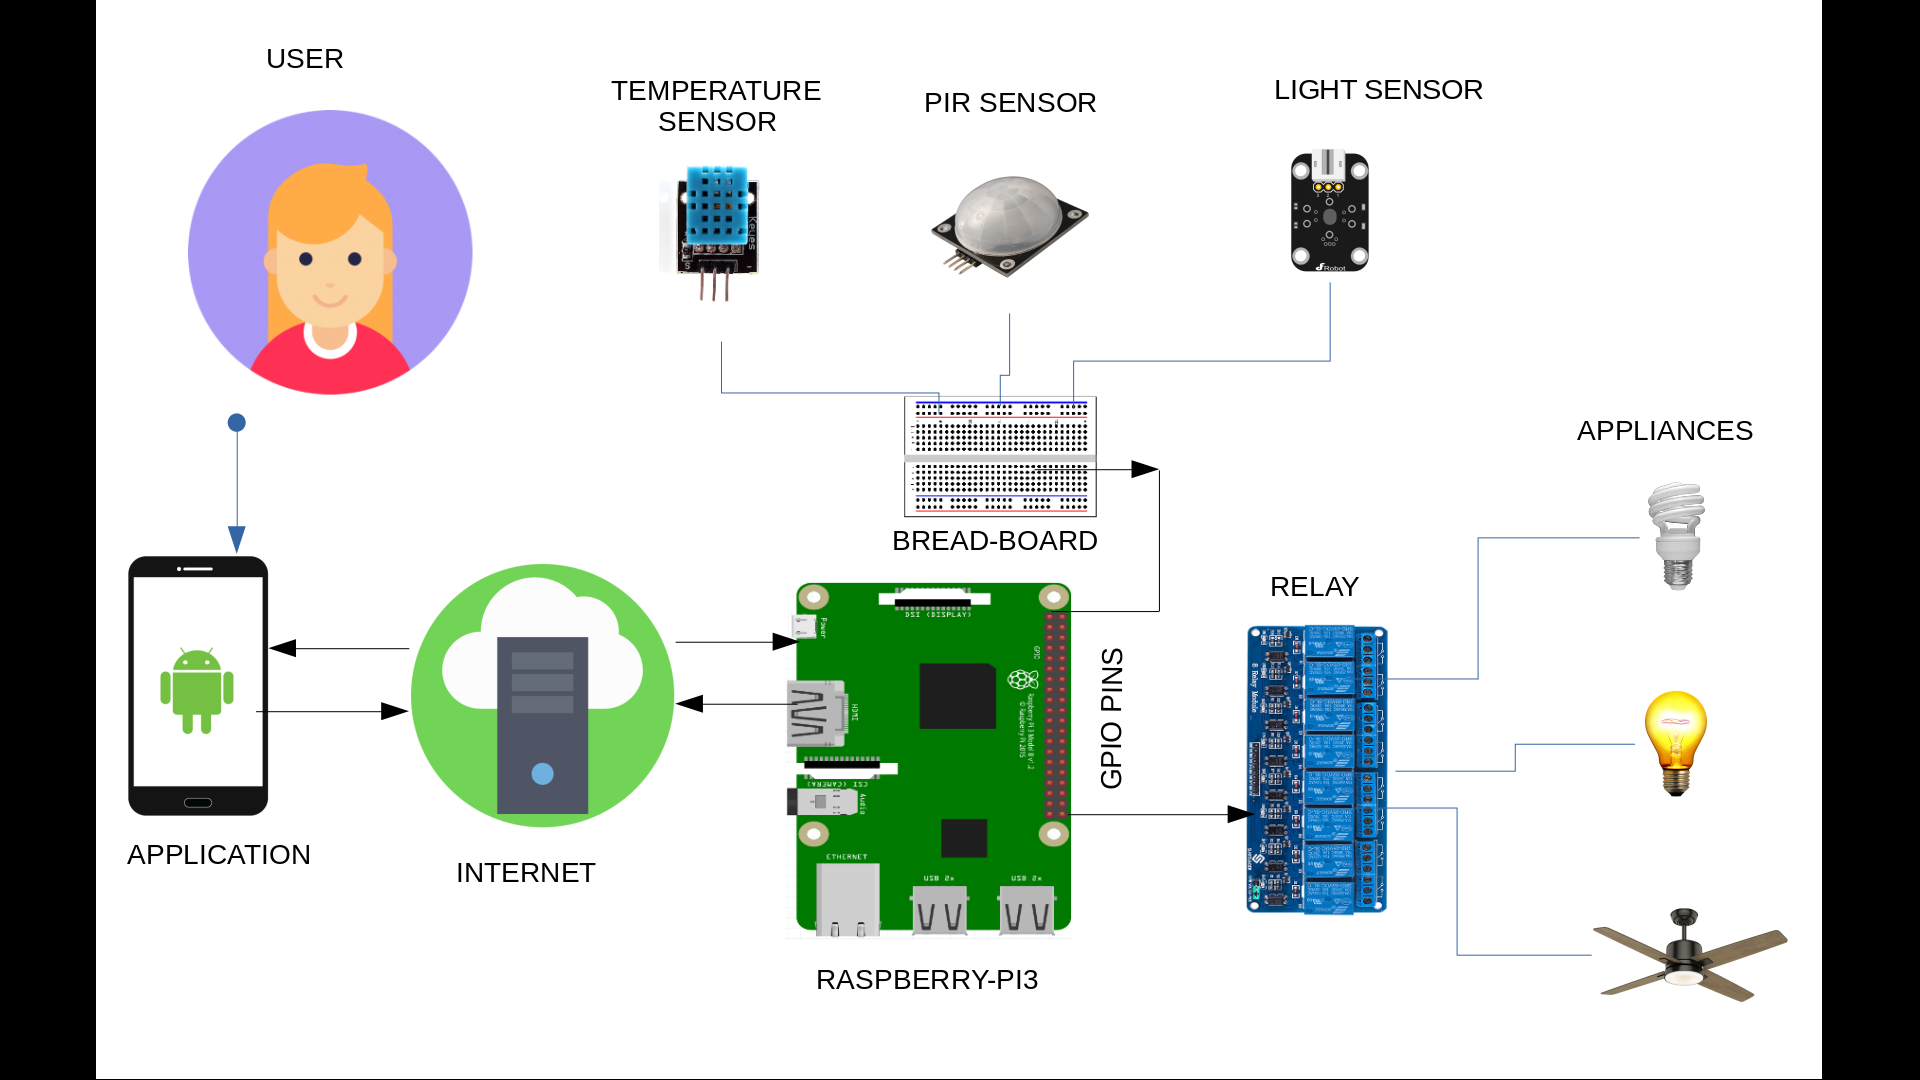
Remote IoT monitoring refers to the process of collecting, analyzing, and managing data from IoT devices located in different geographical locations. This capability is crucial for ensuring the smooth operation of IoT systems, whether in smart homes, industrial automation, or healthcare applications. By leveraging remote monitoring, users can receive real-time updates, troubleshoot issues, and optimize device performance without being physically present.
One of the key technologies enabling remote IoT monitoring is SSH (Secure Shell). SSH provides a secure channel over an unsecured network, allowing users to remotely access and control their Raspberry Pi and connected IoT devices. This protocol is widely used due to its robust encryption and authentication mechanisms, ensuring that sensitive data remains protected during transmission.
Remote IoT monitoring with SSH on Raspberry Pi is particularly appealing because of the platform's affordability, versatility, and extensive community support. Whether you're managing a small-scale IoT project or a large-scale deployment, Raspberry Pi offers the flexibility and power needed to handle diverse IoT applications. In the following sections, we will delve deeper into the specifics of SSH and how it can be configured for remote IoT monitoring.
Understanding SSH on Raspberry Pi
SSH, or Secure Shell, is a cryptographic network protocol used for secure data communication, remote command execution, and other secure network services between two networked computers. On a Raspberry Pi, SSH allows users to remotely access the device's command line interface, enabling them to execute commands, transfer files, and manage IoT devices connected to the Pi.
There are several benefits to using SSH for remote IoT monitoring. First, it provides a secure connection, encrypting all data transmitted between the client and the server. This ensures that sensitive information, such as login credentials and device data, remains protected from unauthorized access. Second, SSH is lightweight and efficient, making it ideal for use on resource-constrained devices like the Raspberry Pi. Finally, SSH supports various authentication methods, including password-based and key-based authentication, allowing users to choose the level of security that best suits their needs.
To use SSH on a Raspberry Pi, you need to ensure that the SSH service is enabled. This can be done through the Raspberry Pi configuration tool or by creating an empty file named "ssh" in the boot partition of the SD card. Once enabled, you can connect to the Raspberry Pi from any SSH client using its IP address and the appropriate credentials. In the next section, we will provide a step-by-step guide on setting up SSH for remote access.
Read also:1965 Lunar Animal Discover The Mystical Year Of The Snake
Setting Up SSH for Remote Access
Setting up SSH on your Raspberry Pi is a straightforward process that involves enabling the SSH service and configuring your network settings. Below is a step-by-step guide to help you get started:
Step 1: Enable SSH on Raspberry Pi
To enable SSH, you can use the Raspberry Pi configuration tool. Open a terminal and type the following command:
sudo raspi-configNavigate to "Interfacing Options" and select "SSH." Choose "Yes" to enable the SSH server. Alternatively, you can create an empty file named "ssh" in the boot partition of your SD card. This method is useful if you are setting up the Pi headlessly (without a monitor).
Step 2: Find Your Raspberry Pi's IP Address
Once SSH is enabled, you need to find the IP address of your Raspberry Pi. You can do this by running the following command in the terminal:
hostname -IThis will display the IP address assigned to your Pi. Note this address, as you will need it to connect via SSH.
Step 3: Connect to Your Raspberry Pi via SSH
To connect to your Raspberry Pi, use an SSH client such as PuTTY (for Windows) or the built-in terminal (for macOS and Linux). Open your SSH client and enter the following command:
ssh pi@your_raspberry_pi_ip_addressReplace "your_raspberry_pi_ip_address" with the actual IP address of your Pi. When prompted, enter the default password ("raspberry") or the password you set during the initial setup.
Step 4: Secure Your SSH Connection
By default, SSH uses password-based authentication, which can be vulnerable to brute-force attacks. To enhance security, consider setting up key-based authentication. This involves generating a public-private key pair on your client machine and copying the public key to your Raspberry Pi. Detailed instructions for this process can be found in the "Securing Your SSH Connection" section below.
Configuring Your Raspberry Pi for IoT Monitoring
Once SSH is set up, the next step is to configure your Raspberry Pi for IoT monitoring. This involves installing the necessary software, connecting IoT devices, and setting up data collection and analysis tools. Below is a guide to help you through the process:
Install Required Software
Depending on your IoT project, you may need to install specific software packages. Common tools include:
- Node-RED: A flow-based development tool for visual programming.
- Mosquitto: An open-source MQTT broker for IoT communication.
- InfluxDB: A time-series database for storing IoT data.
- Grafana: A data visualization tool for creating dashboards.
You can install these tools using the following commands:
sudo apt update sudo apt install nodered mosquitto influxdb grafanaConnect IoT Devices
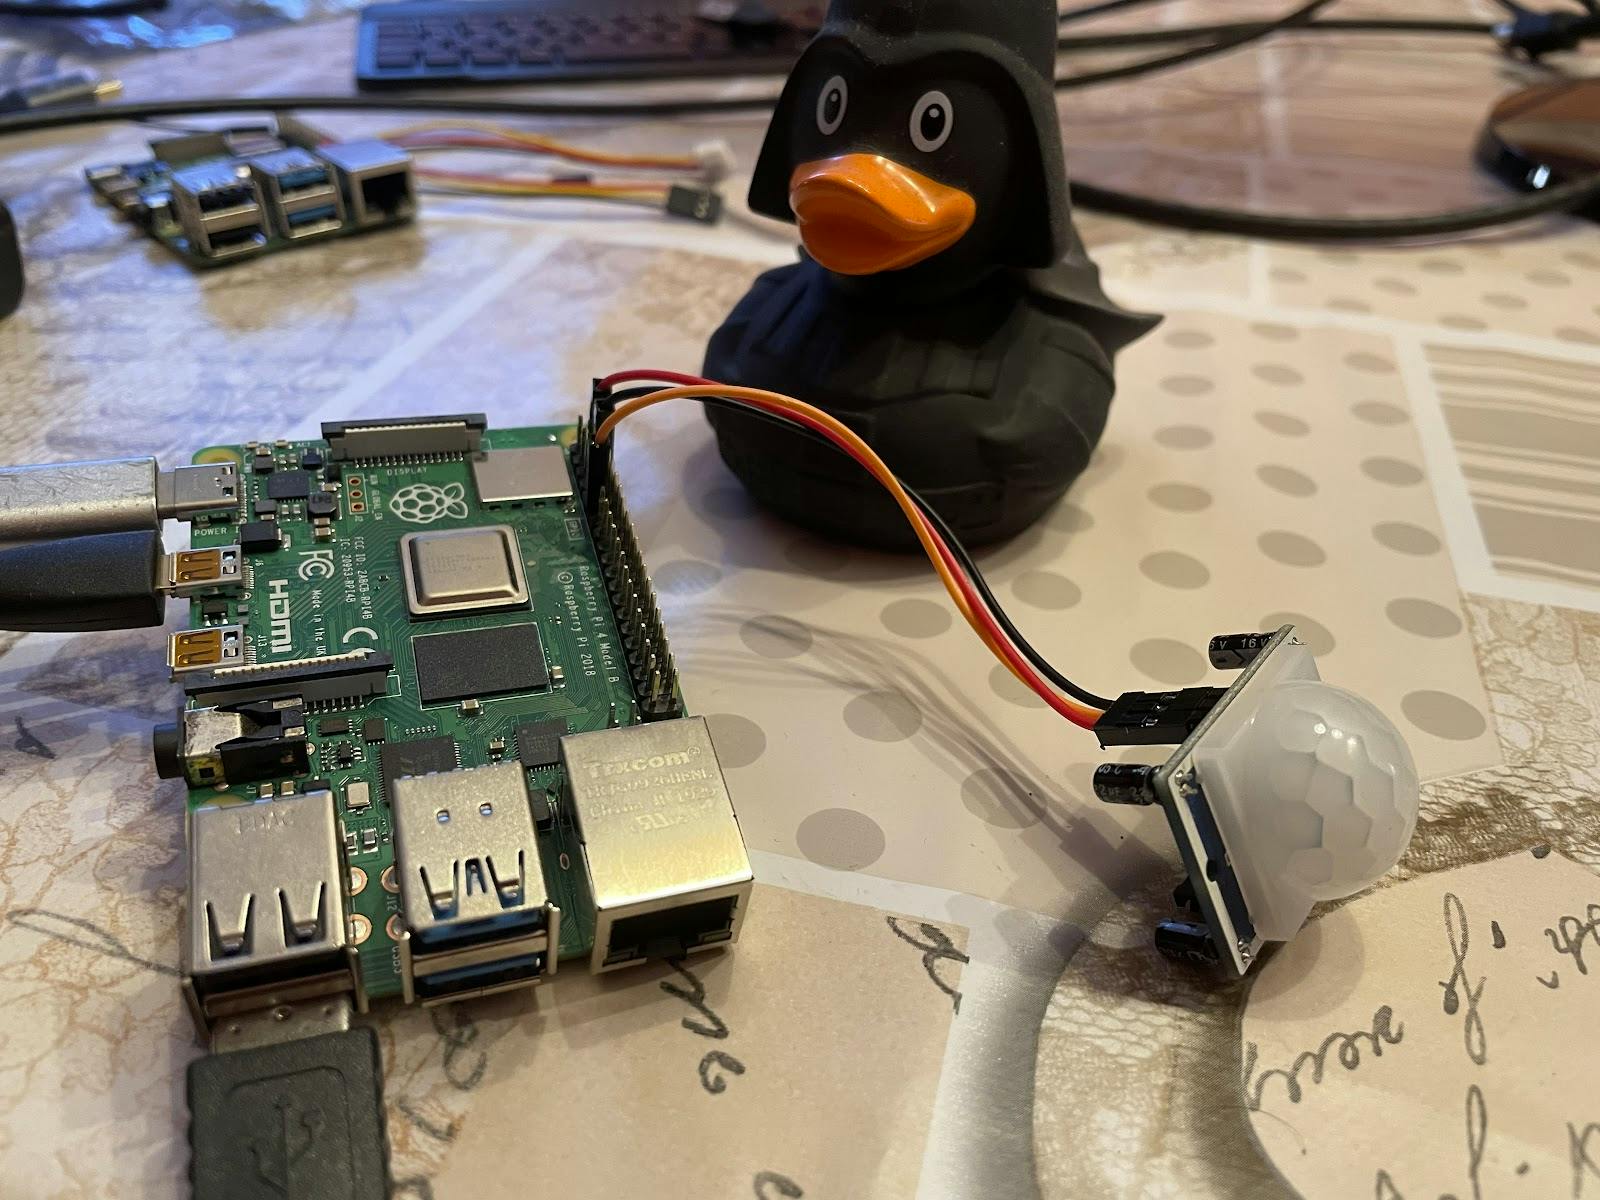
Connect your IoT devices to the Raspberry Pi using appropriate interfaces such as GPIO pins, USB, or wireless protocols like Bluetooth or Wi-Fi. Ensure that the devices are properly configured and recognized by the Pi.
Set Up Data Collection
Configure your IoT devices to send data to the Raspberry Pi. This can be done using protocols like MQTT or HTTP. For example, you can use Node-RED to create flows that collect data from sensors and store it in InfluxDB.
Visualize Data
Use Grafana to create dashboards that display real-time data from your IoT devices. This allows you to monitor device performance and identify trends or anomalies.
Securing Your SSH Connection
Securing your SSH connection is critical to protecting your Raspberry Pi and IoT devices from unauthorized access. Below are some best practices to enhance the security of your SSH setup:
Use Key-Based Authentication
Key-based authentication is more secure than password-based authentication. To set it up, generate a public-private key pair on your client machine:
ssh-keygen -t rsa -b 4096Copy the public key to your Raspberry Pi:
ssh-copy-id pi@your_raspberry_pi_ip_addressDisable password authentication by editing the SSH configuration file:
sudo nano /etc/ssh/sshd_configSet the following parameters:
PasswordAuthentication noRestart the SSH service:
sudo systemctl restart sshChange Default SSH Port
Changing the default SSH port (22) can help reduce the risk of automated attacks. Edit the SSH configuration file:
sudo nano /etc/ssh/sshd_configChange the "Port" parameter to a non-standard port number, such as 2222:
Port 2222Restart the SSH service:
sudo systemctl restart sshUse a Firewall
Configure a firewall to restrict access to your Raspberry Pi. Use UFW (Uncomplicated Firewall) to allow only specific IP addresses or networks to access the SSH port:
sudo ufw allow from your_ip_address to any port 2222Tools and Software for Remote IoT Monitoring
Several tools and software solutions can enhance your remote IoT monitoring capabilities. Below is a list of popular options and their features:
Node-RED
Node-RED is a flow-based development tool that allows users to create visual workflows for IoT applications. It supports a wide range of nodes for integrating with sensors, databases, and cloud services.
Mosquitto
Mosquitto is an open-source MQTT broker that facilitates communication between IoT devices. It is lightweight and suitable for use on Raspberry Pi.
InfluxDB
InfluxDB is a time-series database designed for storing and analyzing IoT data. It supports high write and query loads, making it ideal for real-time monitoring.
Grafana
Grafana is a data visualization tool that allows users to create interactive dashboards. It integrates seamlessly with InfluxDB and other data sources.
Best Practices for Remote IoT Monitoring
To ensure the success of your remote IoT monitoring project, follow these best practices:
- Regularly Update Software: Keep your Raspberry Pi and IoT devices up to date with the latest firmware and software patches.
- Monitor Network Performance: Use tools like Ping and Traceroute to monitor network latency and connectivity.
- Implement Redundancy: Set up backup systems to ensure continuous operation in case of hardware or software failures.
- Document Your Setup: Maintain detailed documentation of your IoT architecture, including device configurations and network settings.
Troubleshooting Common Issues
Despite careful planning, you may encounter issues with your remote IoT monitoring setup. Below are some common problems and their solutions:
SSH Connection Fails
If you are unable to connect to your Raspberry Pi via SSH, check the following:
- Ensure that SSH is enabled on the Pi.
- Verify that the IP address is correct.
- Check your firewall settings to ensure that