Are you looking to manage your Raspberry Pi remotely without the hassle of complex setups? Web SSH on Raspberry Pi offers a seamless solution to access your device securely and efficiently through a web browser. With this innovative approach, you can execute commands, troubleshoot issues, and monitor your Raspberry Pi from anywhere in the world. Whether you're a beginner or an experienced developer, leveraging free Web SSH tools can significantly enhance your productivity.
Remote access to Raspberry Pi has become increasingly popular due to its versatility in IoT projects, home automation, and server management. However, traditional SSH methods often require advanced configurations and port forwarding, which can be daunting for some users. This is where Web SSH comes into play, offering a user-friendly interface that simplifies the process. By using free Web SSH tools, you can eliminate the need for additional software installations while maintaining a secure connection to your device.
In this article, we will explore everything you need to know about Web SSH on Raspberry Pi. From understanding the basics to setting up your own Web SSH server, we'll guide you step by step. You'll also discover the best free tools available, their features, and how they can be integrated into your workflow. By the end of this guide, you'll have a comprehensive understanding of how to harness the power of Web SSH for your Raspberry Pi projects.
Read also:How To Ssh Into Iot Devices Remotely For Free On Android
Table of Contents
- What is Web SSH?
- Benefits of Web SSH on Raspberry Pi
- How to Set Up Web SSH on Raspberry Pi
- Best Free Web SSH Tools for Raspberry Pi
- Step-by-Step Guide to Installing Web SSH
- Security Tips for Web SSH
- Common Issues and Troubleshooting
- Use Cases for Web SSH on Raspberry Pi
- Alternatives to Web SSH
- Conclusion and Next Steps
What is Web SSH?
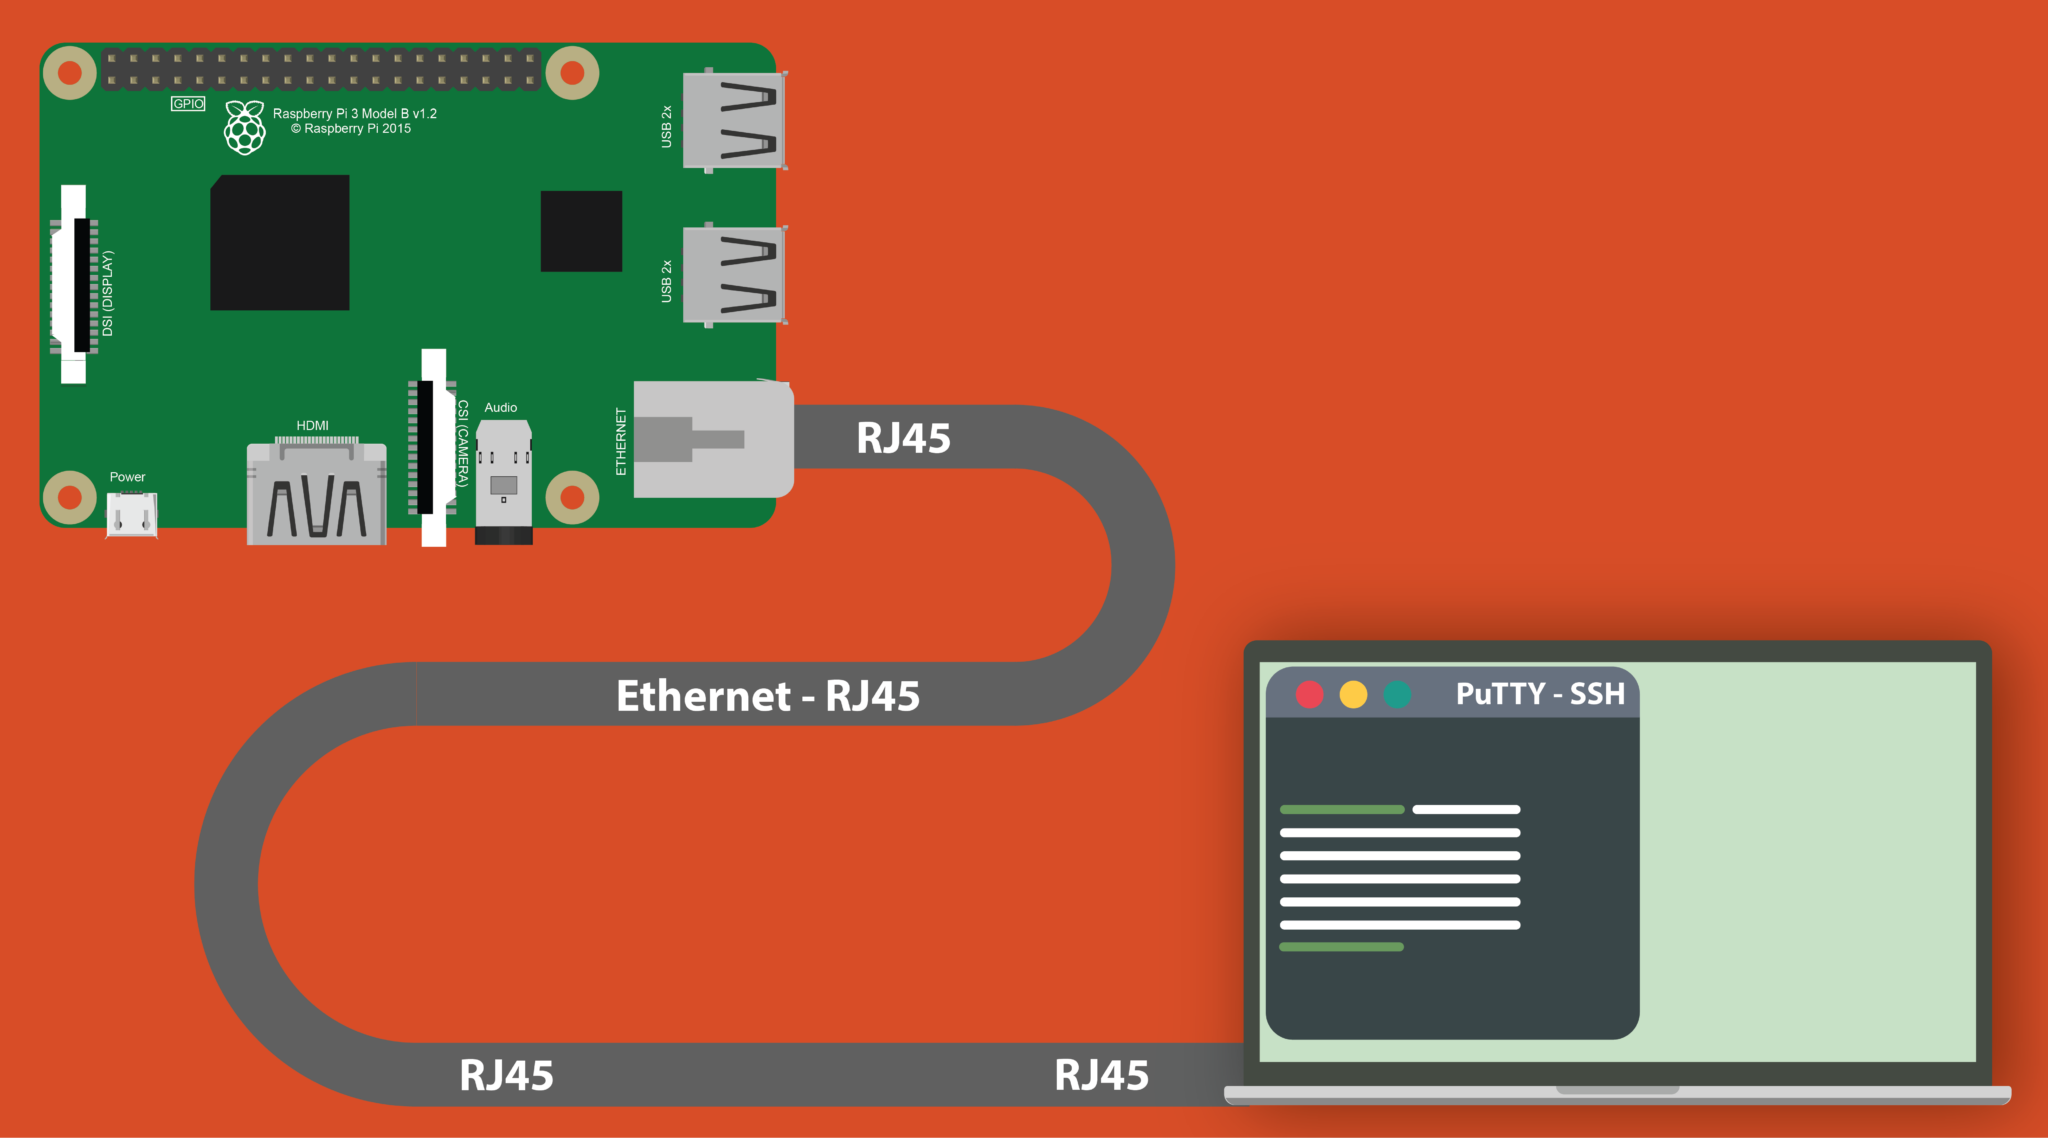
Web SSH is a technology that allows users to access and manage remote servers or devices, such as Raspberry Pi, through a web browser. Unlike traditional SSH, which requires a dedicated terminal application, Web SSH provides a graphical interface that simplifies the process. This makes it accessible even to users who may not be familiar with command-line operations.
Web SSH operates by establishing a secure connection between the user's browser and the remote device. It uses standard SSH protocols, ensuring that the communication remains encrypted and secure. This is particularly important for Raspberry Pi users who rely on their devices for sensitive tasks, such as managing home automation systems or hosting web servers.
How Web SSH Differs from Traditional SSH
While traditional SSH requires users to install and configure an SSH client on their local machine, Web SSH eliminates this step by providing direct access through a browser. This is especially useful for users who need to access their Raspberry Pi from multiple devices or locations without the need to install additional software.
Benefits of Web SSH on Raspberry Pi
Using Web SSH on Raspberry Pi offers several advantages, particularly for users who prioritize convenience, security, and flexibility. Below are some of the key benefits:
- Accessibility: Access your Raspberry Pi from any device with a web browser, eliminating the need for dedicated SSH clients.
- Security: Web SSH tools often include built-in security features, such as encryption and two-factor authentication, to protect your data.
- Cost-Effective: Many Web SSH tools are available for free, making them an affordable solution for remote access.
- Easy Setup: Most Web SSH tools are designed to be user-friendly, allowing even beginners to set them up with minimal effort.
How to Set Up Web SSH on Raspberry Pi
Setting up Web SSH on your Raspberry Pi is a straightforward process that involves a few key steps. Below, we'll guide you through the process to ensure a smooth setup.
Step 1: Update Your Raspberry Pi
Before installing any new software, it's essential to ensure that your Raspberry Pi is up to date. Open the terminal and run the following commands:
Read also:Accessing Raspberry Pi Remotely For Free A Comprehensive Guide
sudo apt update sudo apt upgrade Step 2: Install an SSH Server
If you haven't already enabled SSH on your Raspberry Pi, you can do so by running:
sudo raspi-config Navigate to "Interfacing Options" and enable SSH. Once enabled, your Raspberry Pi will be ready to accept remote connections.
Step 3: Choose a Web SSH Tool
There are several free Web SSH tools available for Raspberry Pi. Some popular options include Shellinabox, GateOne, and Wetty. Each tool has its own unique features, so choose the one that best fits your needs.
Best Free Web SSH Tools for Raspberry Pi
When it comes to free Web SSH tools, there are several options that stand out due to their ease of use, security features, and reliability. Below, we'll explore some of the best tools available for Raspberry Pi users.
1. Shellinabox
Shellinabox is a popular Web SSH tool that provides a web-based terminal emulator. It is lightweight, easy to install, and highly customizable. Shellinabox supports SSL encryption, ensuring that your connection remains secure.
2. GateOne
GateOne is another excellent option for Web SSH on Raspberry Pi. It offers a modern interface and supports multiple terminal sessions. GateOne also includes advanced features such as file uploads and downloads, making it a versatile choice for users.
3. Wetty
Wetty is a simple yet powerful Web SSH tool that runs on Node.js. It provides a clean and intuitive interface, making it ideal for users who prefer a minimalistic design. Wetty is also highly responsive, ensuring smooth performance even on low-powered devices like Raspberry Pi.
Step-by-Step Guide to Installing Web SSH
Installing a Web SSH tool on your Raspberry Pi is a relatively simple process. Below, we'll walk you through the steps to install Shellinabox, one of the most popular options.
Step 1: Install Shellinabox
To install Shellinabox, run the following command in your terminal:
sudo apt install shellinabox Step 2: Configure Shellinabox
Once installed, you can configure Shellinabox by editing its configuration file:
sudo nano /etc/default/shellinabox Modify the settings to suit your preferences, such as changing the port number or enabling SSL encryption.
Step 3: Access Shellinabox
After completing the setup, you can access Shellinabox by navigating to your Raspberry Pi's IP address in a web browser. For example:
https://your-raspberry-pi-ip:4200 Security Tips for Web SSH
While Web SSH offers a convenient way to access your Raspberry Pi, it's crucial to prioritize security to protect your device from unauthorized access. Below are some essential security tips:
- Use Strong Passwords: Ensure that your Raspberry Pi and Web SSH tool are protected by strong, unique passwords.
- Enable Two-Factor Authentication: Add an extra layer of security by enabling two-factor authentication (2FA) for your Web SSH tool.
- Restrict Access: Limit access to your Web SSH interface by configuring firewall rules or using IP whitelisting.
- Keep Software Updated: Regularly update your Raspberry Pi and Web SSH tool to patch any security vulnerabilities.
Common Issues and Troubleshooting
While setting up and using Web SSH on Raspberry Pi, you may encounter some common issues. Below are a few troubleshooting tips to help you resolve them:
Issue 1: Unable to Connect to Web SSH
If you're unable to connect to your Web SSH interface, ensure that:
- The SSH server is enabled on your Raspberry Pi.
- The correct port number is being used in your browser.
- Your firewall or router is not blocking the connection.
Issue 2: Slow Performance
If your Web SSH interface is slow, consider optimizing your Raspberry Pi's performance by:
- Closing unnecessary applications and processes.
- Using a lightweight Web SSH tool.
- Upgrading your Raspberry Pi's hardware, such as adding more RAM.
Use Cases for Web SSH on Raspberry Pi
Web SSH on Raspberry Pi can be used in a variety of scenarios, from managing IoT devices to hosting web servers. Below are some common use cases:
- Home Automation: Control and monitor smart home devices remotely.
- Server Management: Manage web servers or databases hosted on Raspberry Pi.
- Education: Teach programming or system administration in a remote learning environment.
- Development: Test and debug applications directly on your Raspberry Pi.
Alternatives to Web SSH
If Web SSH doesn't meet your needs, there are several alternatives available for remote access to Raspberry Pi. Some popular options include:
- VNC (Virtual Network Computing): Provides a graphical desktop interface for remote access.
- RDP (Remote Desktop Protocol): Offers a similar experience to VNC but is optimized for Windows environments.
- TeamViewer: A proprietary tool that offers secure remote access with additional features like file transfer.
Conclusion and Next Steps
Web SSH on Raspberry Pi offers a powerful and convenient way to manage your device remotely. By leveraging free Web SSH tools, you can enhance your productivity, improve security, and simplify your workflow. Whether you're a beginner or an experienced developer, this technology can be a valuable addition to your toolkit.
If you're ready to take the next step, consider experimenting with different Web SSH tools to find the one that best suits your needs. Don't forget to share your experiences in the comments below or recommend this article to others who might benefit from it. For more guides and tutorials, explore our other articles on Raspberry Pi and IoT projects.