Are you looking to manage your Raspberry Pi remotely with ease and security? Setting up an SSH client on your Raspberry Pi can be a game-changer. Whether you're a hobbyist, developer, or IT professional, understanding how to use SSH (Secure Shell) can significantly enhance your ability to interact with your Raspberry Pi from anywhere. This guide will walk you through everything you need to know about using Raspberry Pi as an SSH client, including setup, configuration, troubleshooting, and best practices.
In today’s interconnected world, remote access to devices is essential. Raspberry Pi, with its versatility and affordability, has become a popular choice for projects ranging from home automation to server management. One of the key features that make Raspberry Pi so powerful is its ability to connect securely to other devices over a network using SSH. This protocol allows you to execute commands, transfer files, and manage systems without needing physical access to the device.
By the end of this article, you’ll have a complete understanding of how to use Raspberry Pi as an SSH client. You’ll learn how to configure SSH, troubleshoot common issues, and explore advanced features to maximize your productivity. Let’s dive in and unlock the full potential of your Raspberry Pi with SSH.
Read also:Unraveling The Mystery Who Is In Nickelback
Table of Contents
- What is SSH and Why Use It with Raspberry Pi?
- Setting Up SSH on Raspberry Pi
- Connecting to Remote Servers Using Raspberry Pi SSH Client
- Configuring SSH for Enhanced Security
- File Transfer with SCP and SFTP
- Troubleshooting Common SSH Issues
- Advanced Features of Raspberry Pi SSH Client
- Best Practices for Secure SSH Usage
- Useful Tools and Resources for Raspberry Pi SSH
- Conclusion and Call to Action
What is SSH and Why Use It with Raspberry Pi?
SSH, or Secure Shell, is a cryptographic network protocol used for secure communication between two devices over an unsecured network. It provides a secure channel for executing commands, transferring files, and managing systems remotely. For Raspberry Pi users, SSH is particularly valuable because it enables remote access without requiring a monitor, keyboard, or mouse connected to the device.
Why Use SSH with Raspberry Pi?
- Remote Management: Control your Raspberry Pi from anywhere in the world.
- Automation: Execute scripts and commands remotely for automated tasks.
- Security: SSH encrypts data, ensuring secure communication.
- Cost-Effective: Eliminates the need for additional hardware like monitors or keyboards.
How SSH Works
SSH operates on a client-server model. The Raspberry Pi acts as the client, connecting to a remote server (or another Raspberry Pi) that acts as the SSH server. Authentication is typically done using passwords or SSH keys, with the latter being more secure. Once connected, you can execute commands, manage files, and perform system administration tasks.
Setting Up SSH on Raspberry Pi
Before you can use your Raspberry Pi as an SSH client, you need to ensure that SSH is enabled and properly configured. Follow these steps to get started:
Enabling SSH on Raspberry Pi
- Boot your Raspberry Pi and open the terminal.
- Type
sudo raspi-configand press Enter. - Navigate to Interfacing Options and select SSH.
- Choose Yes to enable SSH.
- Reboot your Raspberry Pi to apply the changes.
Verifying SSH Installation
To confirm that SSH is enabled, type sudo systemctl status ssh in the terminal. If the service is active, you’re ready to proceed.
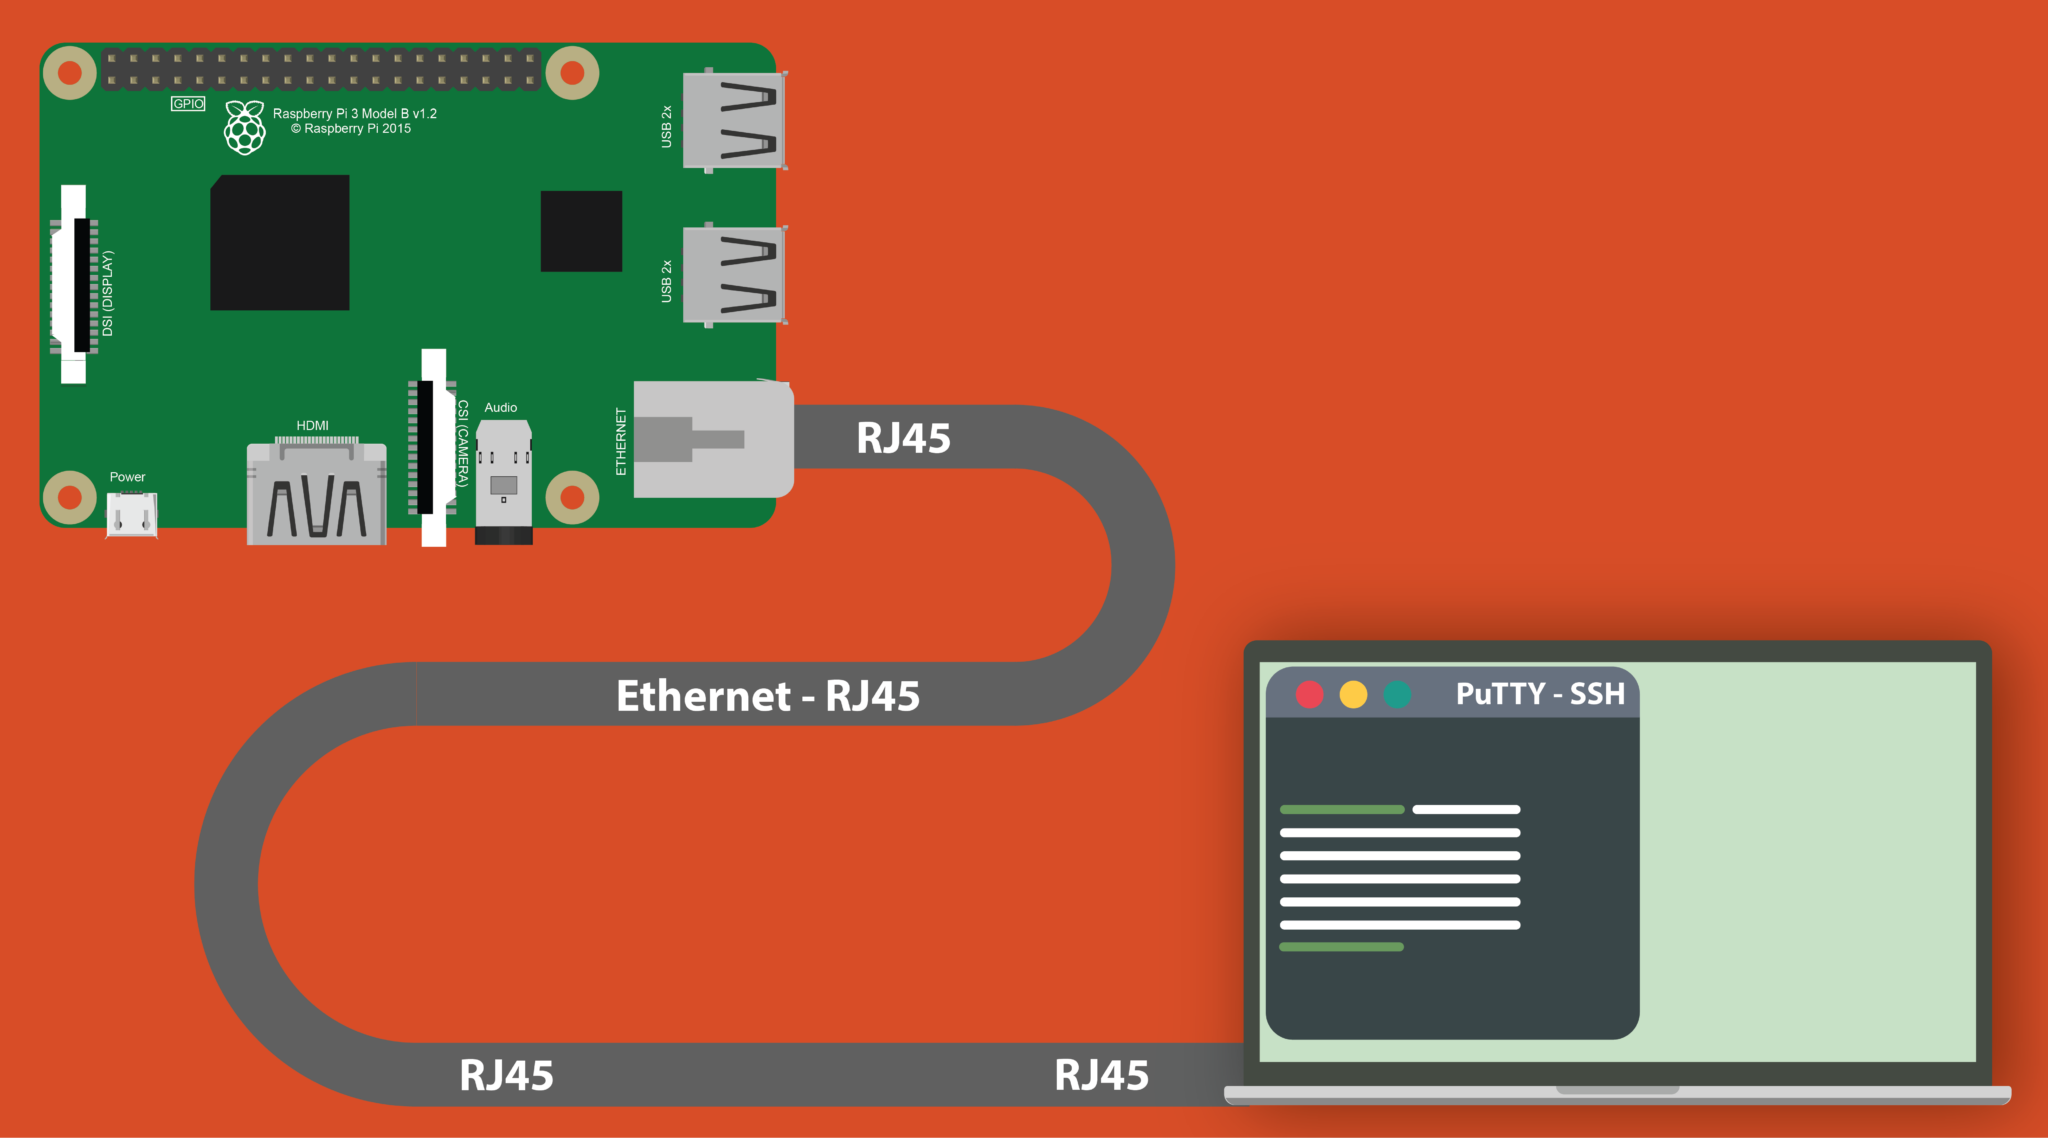
Connecting to Raspberry Pi via SSH
From another device on the same network, use the following command to connect:
ssh pi@raspberrypi.localReplace pi with your username if it’s different, and raspberrypi.local with your Raspberry Pi’s IP address if necessary.
Read also:Access Iot Ssh Login On Android A Comprehensive Guide
Connecting to Remote Servers Using Raspberry Pi SSH Client
Once SSH is set up on your Raspberry Pi, you can use it to connect to remote servers. This is particularly useful for managing cloud servers, IoT devices, or other Raspberry Pis.
Basic SSH Command Syntax
The general syntax for connecting to a remote server is:
ssh username@server-ip-addressFor example:
ssh admin@192.168.1.100Using SSH Keys for Authentication
For enhanced security, consider using SSH keys instead of passwords. Generate an SSH key pair using:
ssh-keygen -t rsa -b 4096Then, copy the public key to the remote server:
ssh-copy-id username@server-ip-addressConfiguring SSH for Enhanced Security
While SSH is inherently secure, additional configuration can further protect your Raspberry Pi SSH client from unauthorized access.
Changing the Default SSH Port
By default, SSH uses port 22. Changing this to a non-standard port can reduce the risk of brute-force attacks. Edit the SSH configuration file:
sudo nano /etc/ssh/sshd_configChange the line #Port 22 to a different port number, such as Port 2222.
Disabling Password Authentication
To prevent password-based attacks, disable password authentication and rely solely on SSH keys:
PasswordAuthentication noSave the file and restart the SSH service:
sudo systemctl restart sshFile Transfer with SCP and SFTP
SSH isn’t just for remote command execution—it’s also a powerful tool for file transfer. Two common methods are SCP (Secure Copy Protocol) and SFTP (SSH File Transfer Protocol).
Using SCP for File Transfer
To copy a file from your Raspberry Pi to a remote server:
scp /path/to/local/file username@server-ip-address:/path/to/remote/directoryUsing SFTP for Interactive File Management
Connect to a remote server using SFTP:
sftp username@server-ip-addressOnce connected, you can use commands like put and get to transfer files.
Troubleshooting Common SSH Issues
SSH issues can arise due to misconfigurations, network problems, or authentication errors. Here are some common problems and their solutions:
Connection Refused
If you receive a “Connection refused” error, ensure that:
- SSH is enabled on the Raspberry Pi.
- The correct IP address is being used.
- The SSH service is running.
Permission Denied
Double-check your username, password, or SSH key. Ensure that the user has the necessary permissions to access the server.
Slow Connection
Slow SSH connections can be caused by DNS resolution issues. Add the following line to /etc/ssh/sshd_config:
UseDNS noAdvanced Features of Raspberry Pi SSH Client
Once you’re comfortable with the basics, you can explore advanced SSH features to enhance your workflow.
SSH Tunnels for Secure Browsing
Create an SSH tunnel to encrypt your internet traffic:
ssh -D 8080 -C -N username@server-ip-addressConfigure your browser to use the SOCKS proxy on port 8080.
SSH Multiplexing for Faster Connections
SSH multiplexing allows you to reuse an existing connection for multiple sessions, reducing latency. Add the following to your SSH config file:
Host * ControlMaster auto ControlPath /tmp/ssh_mux_%h_%p_%r ControlPersist 4hBest Practices for Secure SSH Usage
Following best practices ensures that your Raspberry Pi SSH client remains secure and reliable.
Regularly Update Your System
Keep your Raspberry Pi and SSH software up to date to patch vulnerabilities:
sudo apt update && sudo apt upgradeLimit User Access
Restrict SSH access to specific users by editing /etc/ssh/sshd_config:
AllowUsers usernameMonitor SSH Logs
Regularly check SSH logs for suspicious activity:
sudo journalctl -u sshUseful Tools and Resources for Raspberry Pi SSH
Several tools and resources can enhance your SSH experience with Raspberry Pi.
Recommended Tools
- Termius: A cross-platform SSH client with a user-friendly interface.
- MobaXterm: A powerful SSH client for Windows users.
- WinSCP: A graphical SFTP client for Windows.
Helpful Resources
Conclusion and Call to Action
Raspberry Pi’s SSH client capabilities make it an indispensable tool for remote management and secure communication. By following the steps outlined in this guide, you can confidently set up, configure, and use SSH on your Raspberry Pi. Whether you’re managing servers, automating tasks, or exploring advanced features, SSH empowers you to do more with your Raspberry Pi.
If you found this guide helpful, please share it with others who might benefit. Leave a comment below with your thoughts, questions, or experiences with Raspberry Pi SSH. For more articles like this, explore our website and stay tuned for updates. Unlock the full potential of your Raspberry Pi today!