SSH client on Raspberry Pi is a powerful tool that allows users to remotely access and manage their devices securely. Whether you're a beginner or an advanced user, understanding how to set up and use an SSH client on your Raspberry Pi is essential for efficient system administration. Raspberry Pi, a compact yet versatile single-board computer, has gained immense popularity for its ability to handle a wide range of tasks, from home automation to server hosting. However, managing it remotely requires secure communication, and that's where SSH comes into play.
SSH, or Secure Shell, provides an encrypted connection between your local machine and the Raspberry Pi, ensuring that your data remains safe from unauthorized access. This guide will walk you through everything you need to know about setting up and using an SSH client on Raspberry Pi, including step-by-step instructions, security tips, and advanced configurations. By the end of this article, you'll have a clear understanding of how to leverage SSH to enhance your Raspberry Pi experience.
In today's interconnected world, remote access has become a necessity for tech enthusiasts, developers, and system administrators. Raspberry Pi users, in particular, can benefit greatly from SSH, as it allows them to control their devices from anywhere in the world. Whether you're troubleshooting issues, transferring files, or running commands, SSH ensures that your actions are both efficient and secure. In this article, we'll explore the basics of SSH, how to configure it on your Raspberry Pi, and tips to optimize its performance.
Read also:Remote Raspberry Pi Access Free A Comprehensive Guide To Secure And Efficient Remote Control
Table of Contents
- What is SSH and Why Use It on Raspberry Pi?
- Prerequisites for Setting Up SSH on Raspberry Pi
- How to Enable SSH on Raspberry Pi
- Connecting to Raspberry Pi Using an SSH Client
- Best Practices for Securing SSH on Raspberry Pi
- Advanced SSH Configurations for Raspberry Pi
- Troubleshooting Common SSH Issues
- Top SSH Clients for Managing Raspberry Pi
- Real-World Use Cases of SSH on Raspberry Pi
- Conclusion and Next Steps
What is SSH and Why Use It on Raspberry Pi?
SSH, or Secure Shell, is a cryptographic network protocol used for secure communication between two devices over an unsecured network. It provides a secure channel for executing commands, transferring files, and managing systems remotely. For Raspberry Pi users, SSH is particularly valuable because it allows them to control their devices without needing physical access.
There are several reasons why SSH is widely used on Raspberry Pi:
- Remote Access: You can manage your Raspberry Pi from any device with an internet connection.
- Security: SSH encrypts all data transmitted between devices, protecting it from eavesdropping and tampering.
- Efficiency: SSH eliminates the need for physical interaction, saving time and effort.
- Automation: You can automate tasks and scripts using SSH, making it ideal for server management and IoT projects.
How SSH Works on Raspberry Pi
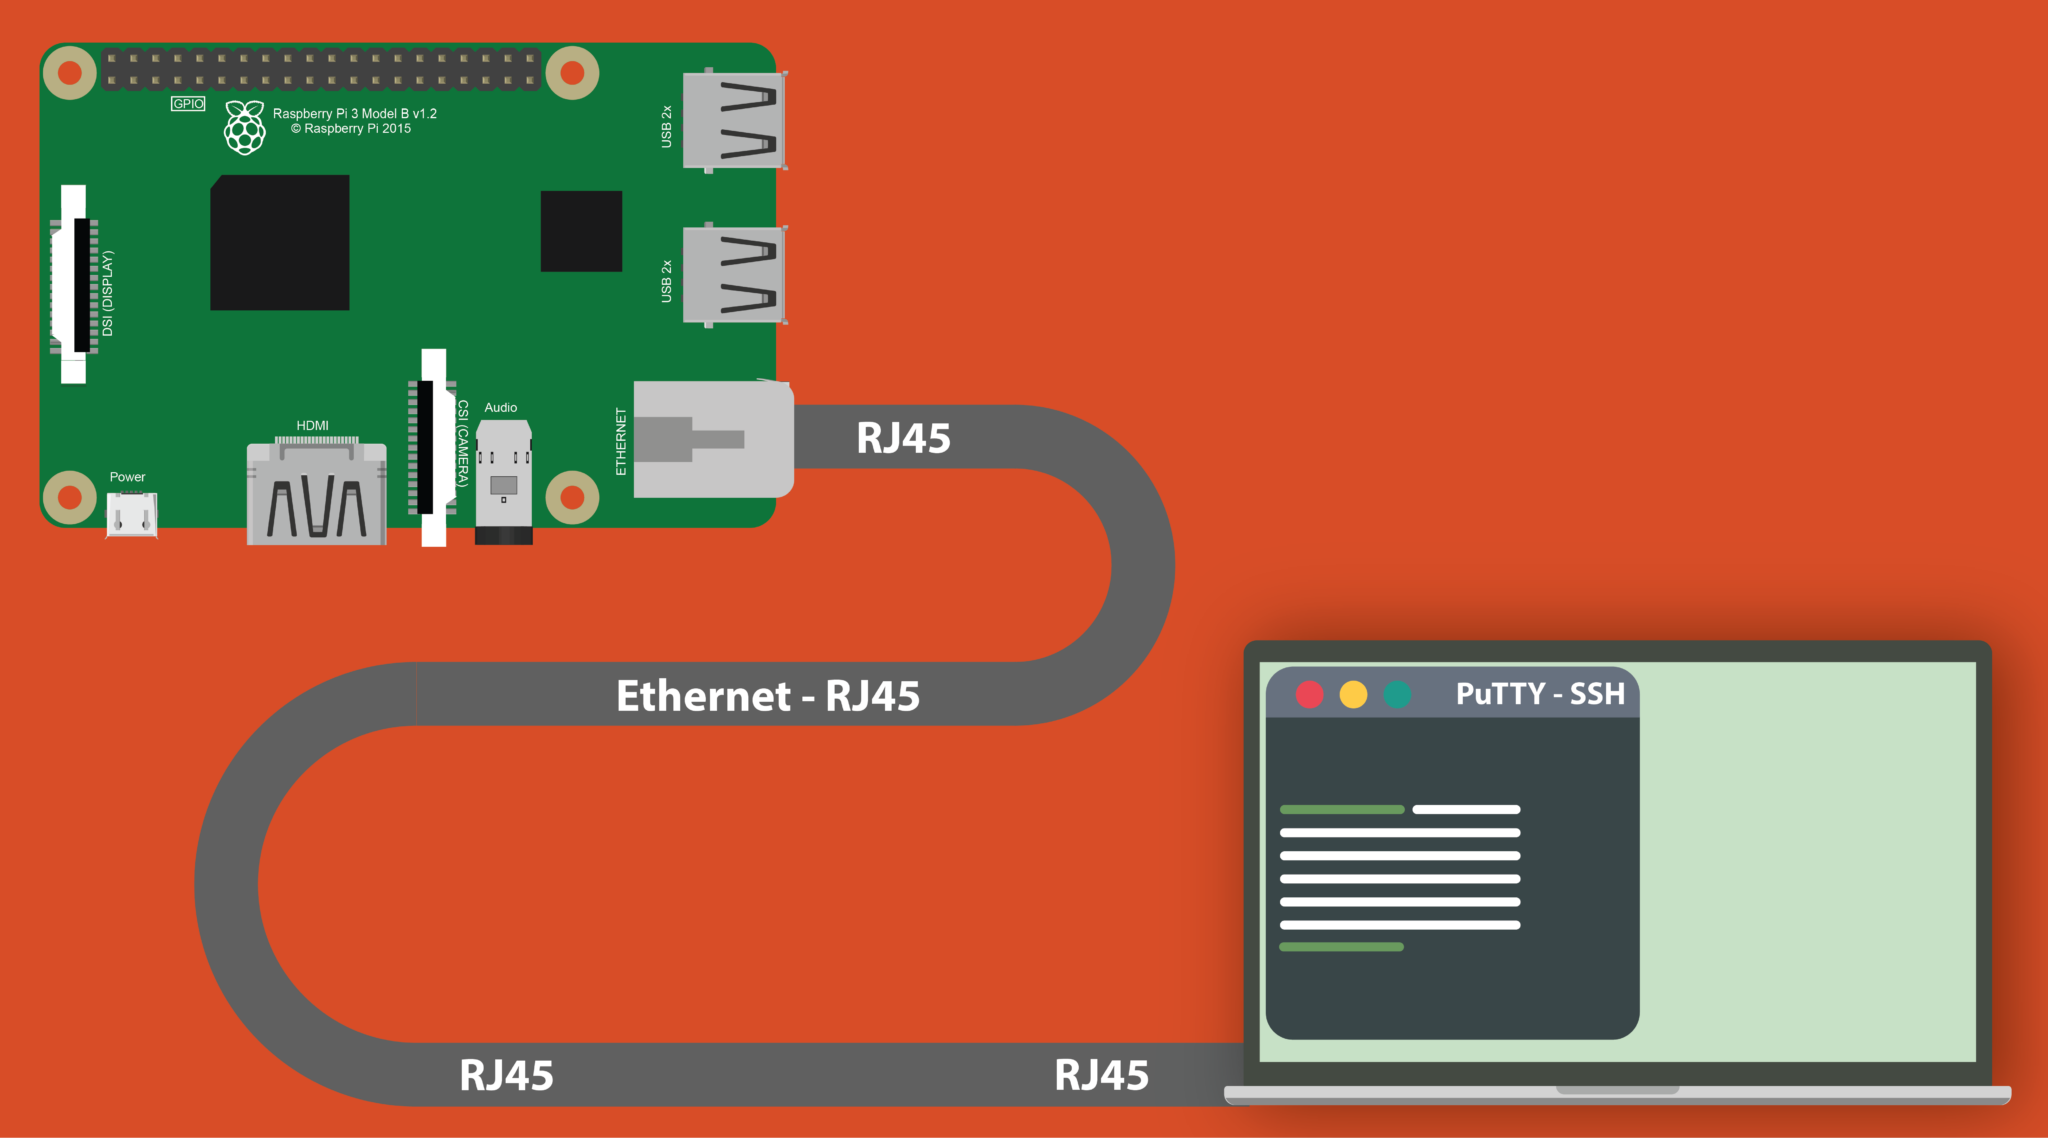
SSH operates using a client-server model. The Raspberry Pi acts as the SSH server, while your local machine (e.g., laptop, smartphone) serves as the SSH client. When you initiate an SSH connection, the client sends a request to the server, which authenticates the client using a password or cryptographic key. Once authenticated, a secure session is established, allowing you to execute commands and transfer files.
Prerequisites for Setting Up SSH on Raspberry Pi
Before you begin setting up SSH on your Raspberry Pi, ensure that you have the following prerequisites in place:
- A Raspberry Pi device with Raspbian OS installed.
- An active internet connection for both the Raspberry Pi and your local machine.
- A monitor, keyboard, and mouse for initial setup (optional if you're using a headless setup).
- Basic knowledge of Linux commands and terminal usage.
Updating Your Raspberry Pi
To ensure smooth SSH functionality, it's crucial to update your Raspberry Pi's operating system and software packages. Open the terminal and run the following commands:
sudo apt update sudo apt upgradeThese commands will fetch the latest updates and install them on your device.
Read also:How To Remotely Access Raspberry Pi With Remoteiot Download Free A Comprehensive Guide
How to Enable SSH on Raspberry Pi
Enabling SSH on Raspberry Pi is a straightforward process. Depending on your setup, you can enable it either through the Raspberry Pi desktop interface or by editing configuration files manually.
Enabling SSH via Raspberry Pi Desktop
- Open the Raspberry Pi desktop and navigate to the main menu.
- Go to Preferences > Raspberry Pi Configuration.
- Click on the Interfaces tab.
- Enable SSH by selecting the Enable radio button.
- Click OK to save the changes.
Enabling SSH via Command Line
If you're using a headless setup, you can enable SSH by creating an empty file named ssh in the boot partition of your Raspberry Pi's SD card. Follow these steps:
- Insert the SD card into your computer.
- Open the boot partition and create a new file named
ssh(no extension). - Eject the SD card and insert it back into your Raspberry Pi.
- Power on the device, and SSH will be enabled automatically.
Connecting to Raspberry Pi Using an SSH Client
Once SSH is enabled on your Raspberry Pi, you can connect to it using an SSH client. Here's how to do it on different operating systems:
Connecting from Windows
On Windows, you can use an SSH client like PuTTY or the built-in OpenSSH client in Windows 10 and later versions.
- For PuTTY, enter the Raspberry Pi's IP address in the "Host Name" field and click Open.
- For OpenSSH, open the Command Prompt and type:
ssh pi@.
Connecting from macOS and Linux
On macOS and Linux, the terminal comes with a built-in SSH client. Simply open the terminal and type:
ssh pi@Replace
Best Practices for Securing SSH on Raspberry Pi
While SSH is inherently secure, there are additional steps you can take to enhance its security:
- Change the Default Password: The default username and password for Raspberry Pi are well-known. Change them immediately after setup.
- Disable Password Authentication: Use SSH keys for authentication instead of passwords to prevent brute-force attacks.
- Change the Default SSH Port: Modify the default SSH port (22) to a non-standard port to reduce the risk of automated attacks.
- Use a Firewall: Configure a firewall to allow SSH traffic only from trusted IP addresses.
Generating SSH Keys
To generate SSH keys, run the following command on your local machine:
ssh-keygen -t rsa -b 4096Follow the prompts to create a key pair. Then, copy the public key to your Raspberry Pi using:
ssh-copy-id pi@Advanced SSH Configurations for Raspberry Pi
For users looking to optimize their SSH setup, here are some advanced configurations:
- SSH Tunneling: Use SSH tunnels to securely access services running on your Raspberry Pi.
- Port Forwarding: Configure port forwarding to access Raspberry Pi services from external networks.
- SSH Agent Forwarding: Enable agent forwarding to manage multiple SSH connections seamlessly.
Configuring SSH Config File
Create or edit the ~/.ssh/config file on your local machine to simplify SSH connections:
Host raspberrypi HostName User pi Port 22 Troubleshooting Common SSH Issues
If you encounter issues while using SSH, here are some common problems and their solutions:
- Connection Refused: Ensure SSH is enabled on the Raspberry Pi and the correct IP address is used.
- Permission Denied: Verify your username and password or SSH key configuration.
- Slow Connection: Check your network settings and ensure the Raspberry Pi has sufficient resources.
Top SSH Clients for Managing Raspberry Pi
Here are some popular SSH clients you can use to manage your Raspberry Pi:
- PuTTY: A lightweight and user-friendly SSH client for Windows.
- OpenSSH: A built-in SSH client available on macOS and Linux.
- MobaXterm: A versatile SSH client with additional tools for remote management.
Real-World Use Cases of SSH on Raspberry Pi
SSH is widely used in various applications, including:
- Managing home automation systems.
- Hosting web servers and databases.
- Running IoT projects and remote sensors.
Conclusion and Next Steps
In this comprehensive guide, we've explored the essentials of using an SSH client on Raspberry Pi, from enabling SSH to securing your connection and optimizing its performance. By following the steps outlined in this article, you can efficiently manage your Raspberry Pi remotely while ensuring the highest level of security.
Now that you're equipped with the knowledge to use SSH on your Raspberry Pi, why not put it into practice? Try setting up SSH on your device, experiment with advanced configurations, and explore the endless possibilities it offers. Share your experiences in the comments below or connect with us for more tips and tutorials on Raspberry Pi and SSH.